How to create your first promo campaign on Vouchery.io?
In this tutorial, we will walk you through how to create your first campaign using Vouchery.io User Interface. With Vouchery, you can easily create main campaign that includes multiple promo campaigns, whether they are give-aways, discounts, loyalty rewards or gift cards!
Let's go through 4 steps that will allow you to set up your promo & generate the codes ( or make them available to be picked up via API ):
- Setup New Campaign
- Define Promotion
- Reward Settings and Limitations
- Generation and Setup
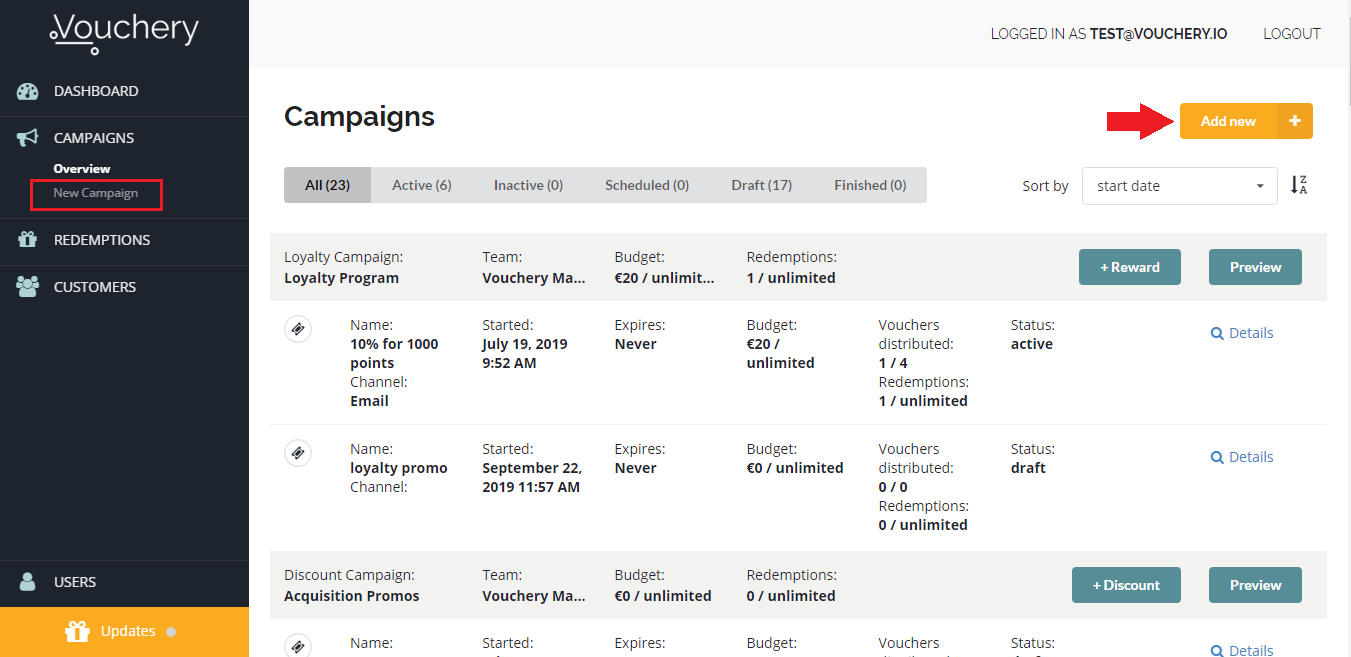
After logging in, you can start a new campaign by choosing “New Campaign” under campaigns in the dashboard menu, or from the “Overview” page by choosing “Add New” on the top right.
Step one: Setup New Campaign
This step consists of two main parts:
1. Campaign basics:
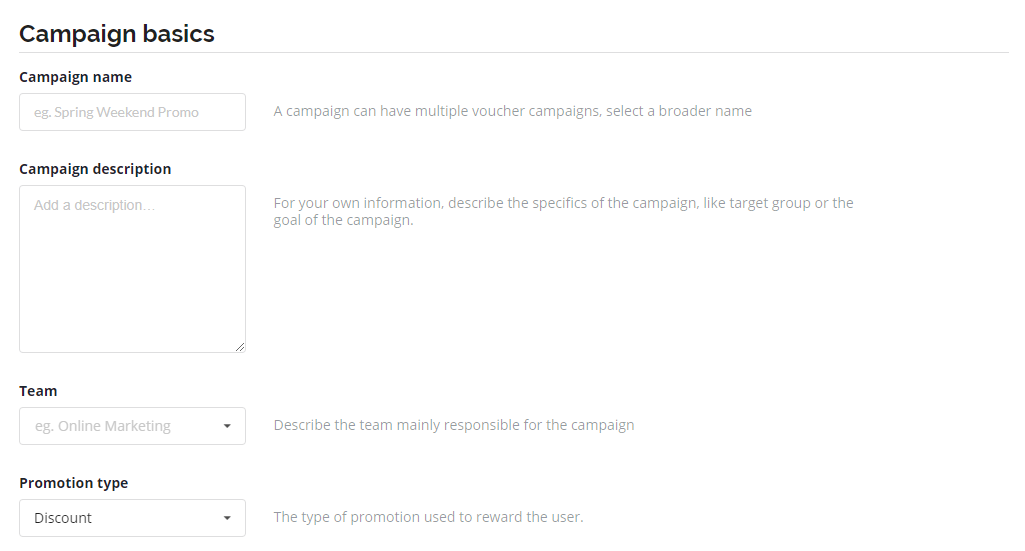
In this step you will need to setup the general information about the main campaign to be created:
Campaign name:
A campaign can have multiple voucher campaigns-Check out how, so we advise you to choose a broader name, eg. Black Friday sale, Back to school discount, Spring Weekend Promo.
Campaign description:
In vouchery we believe that every promotional campaign must be well-thought through, this section is to add and share with your team your campaign information. Eg, description of the campaign’s goal, target group, etc.
Team:
Who is primarily in charge of this campaign, your marketing team, sales, etc.
Promotion Type:
In this section, you can choose the type of promotion that will be running in this campaign.
We offer three types of promotions: Discounts ( that includes freebies, giveaways, bundles, etc ), Loyalty Rewards and Gift Cards. You can integrate Vouchery with referral software as well - please get in touch with us.

Note: Soon we will be adding Referral Program, it’s in development!
Campaign restrictions:
Set the general restrictions of your campaign; maximum campaign budget, budget code and a maximum number of redemptions.
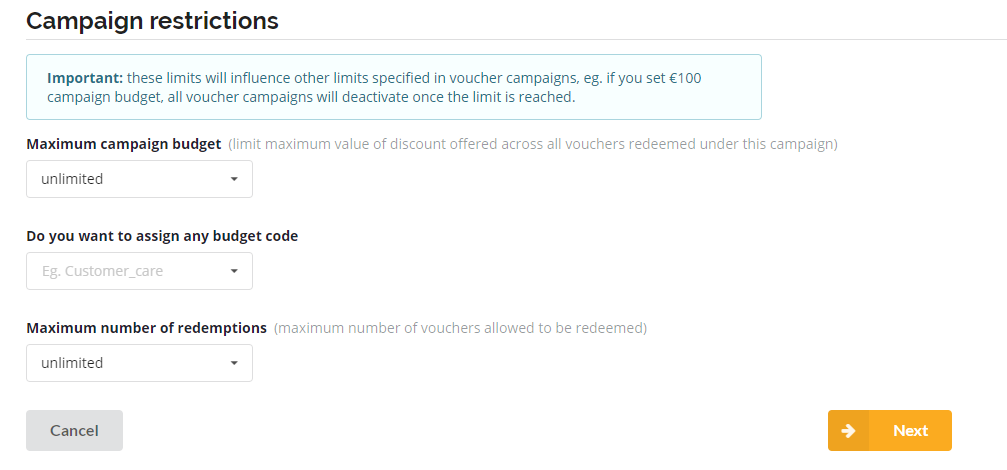
Note that, the limits you set here will influence other limits set in any active voucher campaigns in this main campaign.

By default, the campaign budget will be set to unlimited, when changed to limited, you will have the possibility to set monthly or daily limits.
Step Two: Define Promotion
In this step, you will be defining the first voucher campaign that will run under your main campaign.
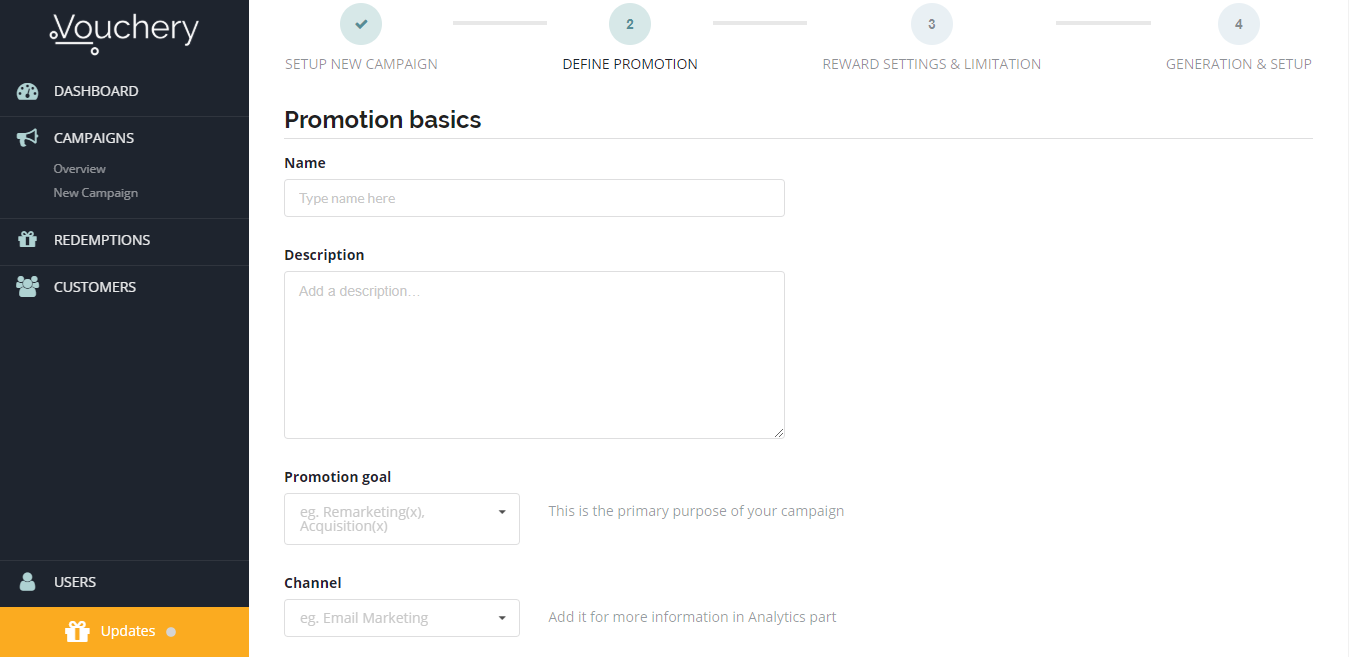
Promotion basics:
Name: setup your voucher campaign name, here we advise you to be more specific.
Description: share important information with your team.
Promotion goal: this should be the primary purpose of your voucher campaign. Eg, Acquisition, Loyalty, etc.

Channel: for better analytics add the channel where the voucher will be distributed.

2. Promo limits:
Setup your voucher campaign maximum budget and number of redemptions. Note that, once these numbers are met by one voucher, the other vouchers within the campaign will be deactivated automatically

Step Three: Reward settings and limitations:
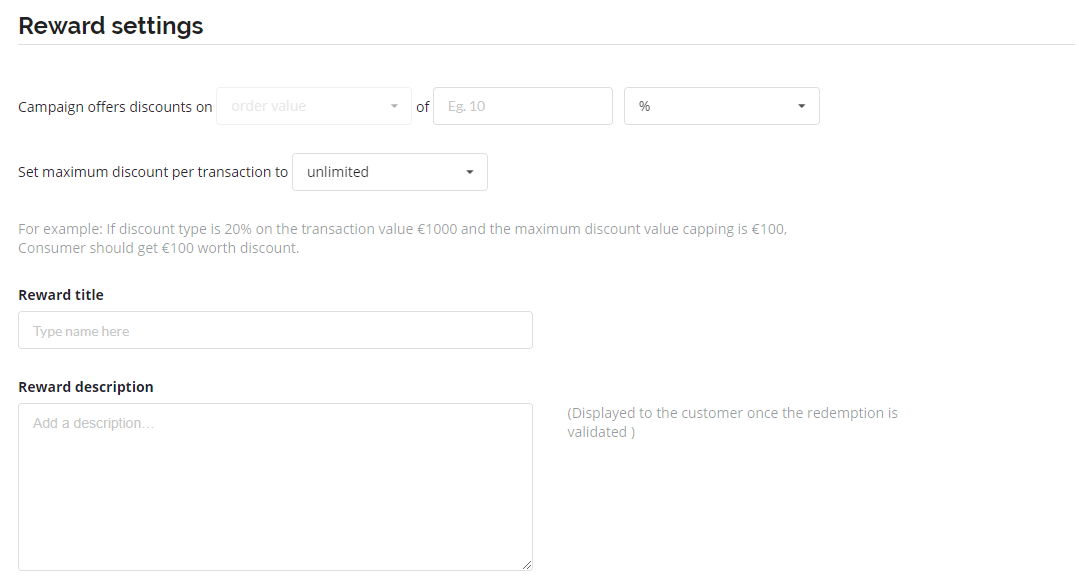
Choose what the promo offers discounts on: the order value or product type (coming soon!)
Choose the promo discount type: you have two options, percent or amount.

Maximum discount per transaction:
This is the maximum discounted value offered by this promo. For example: If discount type is 20% on the transaction value €1000 and the maximum discount value capping is €100, Consumer should get €100 worth discount not a €200.
Next, you will need to add the reward title and description.

Note that this is the information that will be displayed to the customer, we advice you to be precise as possible and explain all the important information regarding the promo validation and redemption.
General promo limitations:
This step is crucial as you will establish limitations for your vouchers.

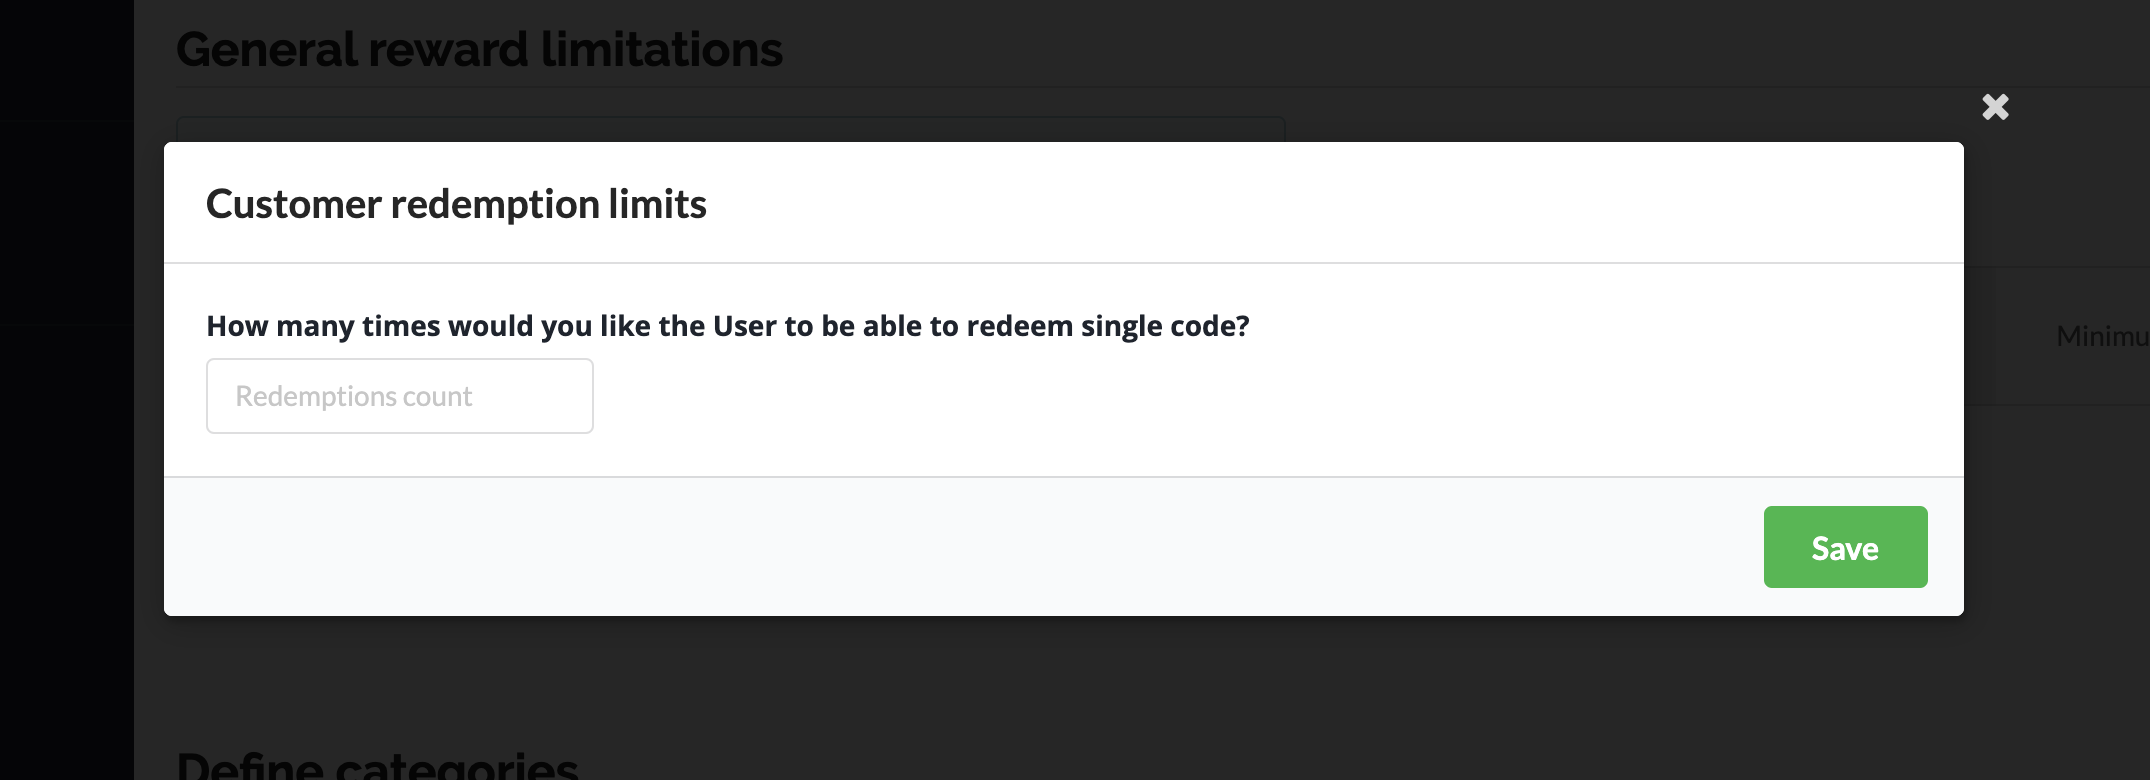
Customer Redemption Limits:
Here you will be setting how many times the promo will be validated by each customer.
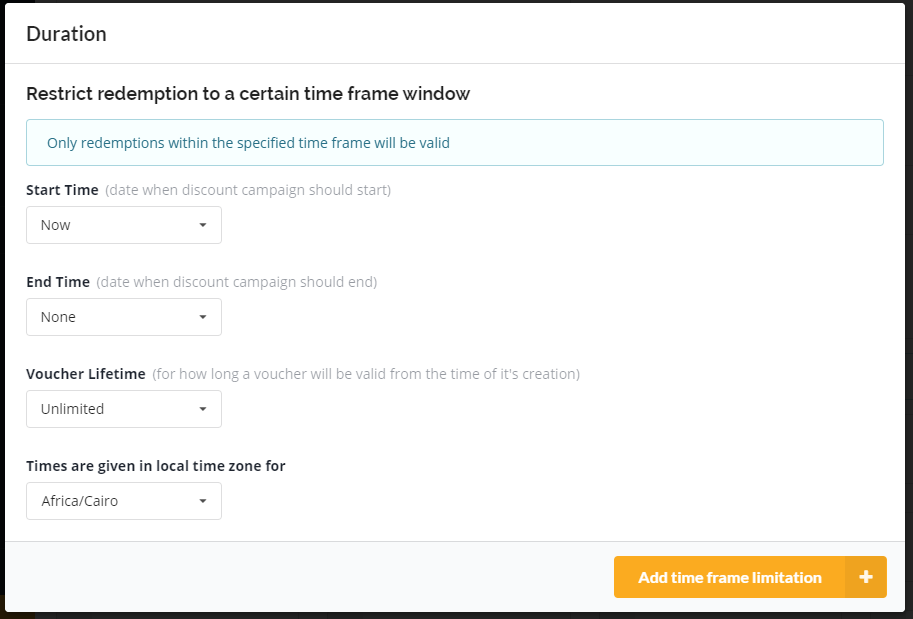
Time of Order and Duration
Here you can create particular time windows where the promo codes are validated.
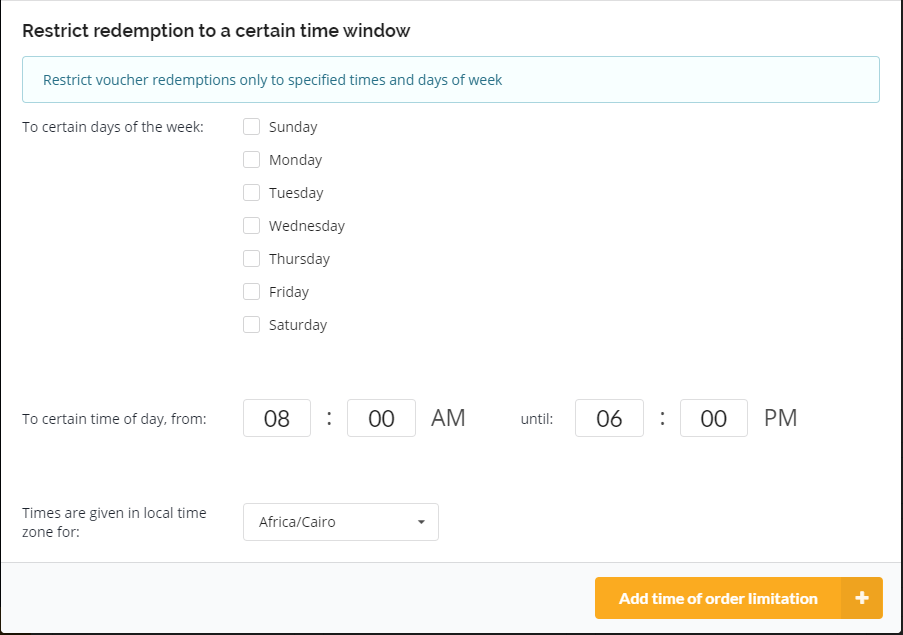
Vouchery allows you to set time frames and specific time rules where the promo is valid for redemption:
- Restricted to be valid only to certain weekdays. (Only Mondays)
- Start and expiration date according to the chosen time zone.
This limitation is crucial as any promo redemption before or after the set time-frame will be blocked by Vouchery.
Minimum Transaction Order
This is the minimum order value where the promo will be validated.
In the near future, we will also enable rewarding users automatically, based on particular basket conditions. It's in development, so stay tuned for that!

Define Categories
Vouchery allows you to define different scenarios and situations where the promo will be validated, like:
- Restricting the promo to certain customer segment.
- Platform- only redeemable on the mobile app.
- Product category- T-shirt, jeans.
- Customer segment.
- Currency- Euro only. (Note we support all currencies)
- Area- Available only in Germany.
You can create your own category that serves best your goals.
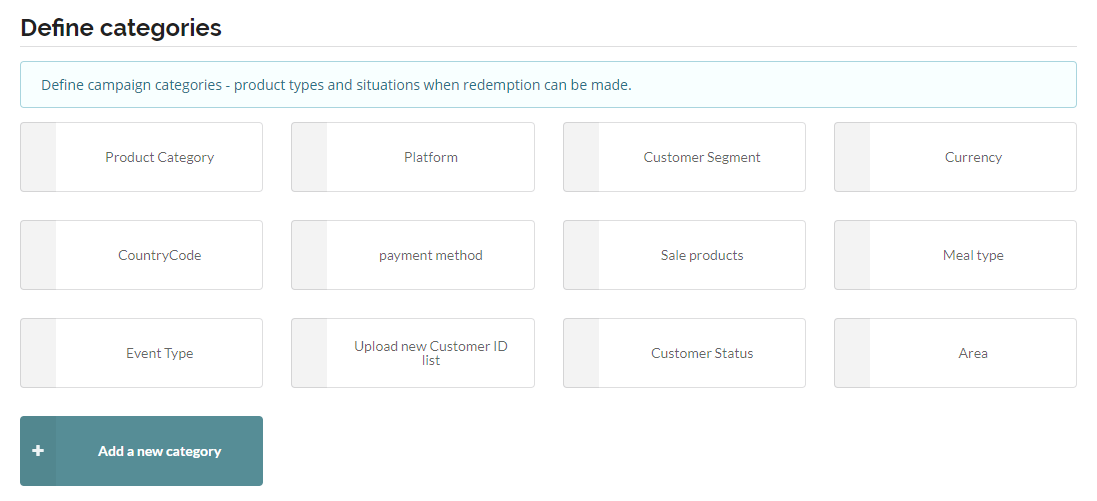
Each category allows you include or exclude the allowed buying circumstances for validation. For example you can include or exclude a customer segment allowed to redeem the promo.

Step Four: Generation and setup:
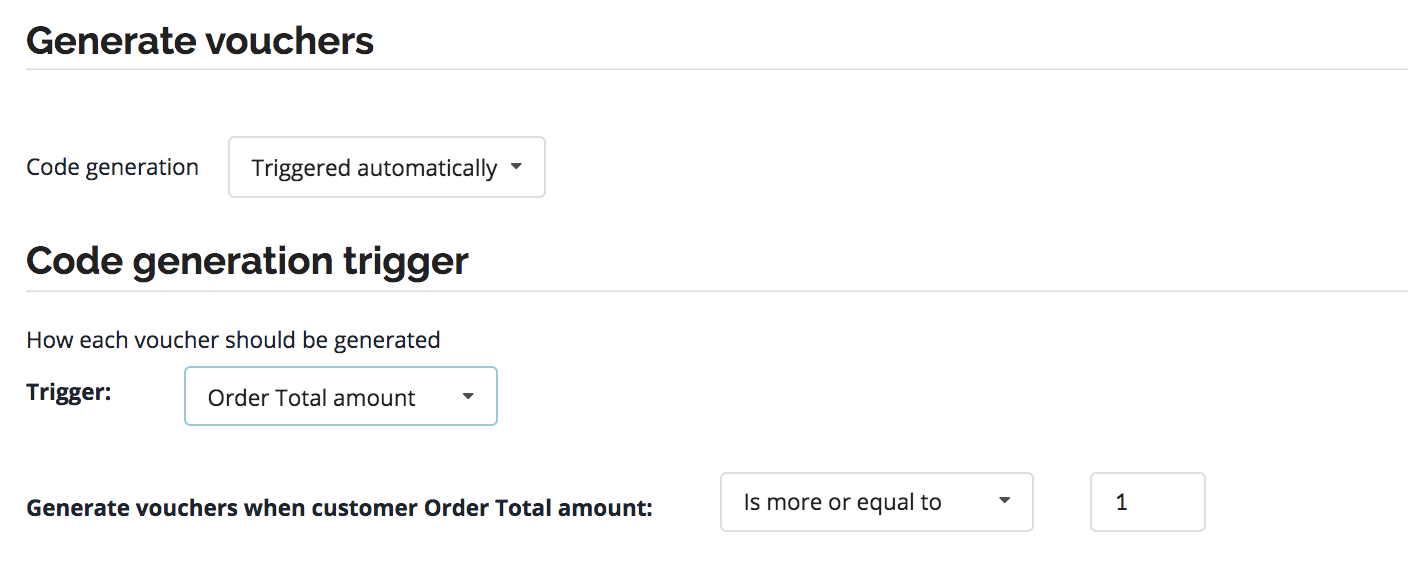
You can generate codes manually or automatically triggered when a certain type of action is fulfilled.
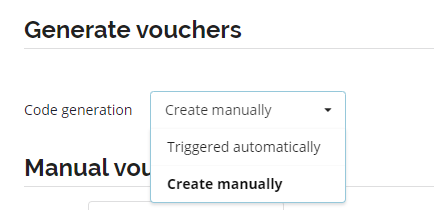
After choosing to create the codes manually you will have the option to create generic or unique codes.
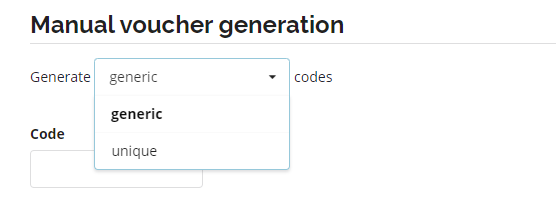
In case you chose to generate a Generic code, you will just need to write the code then press "Generate vouchers".
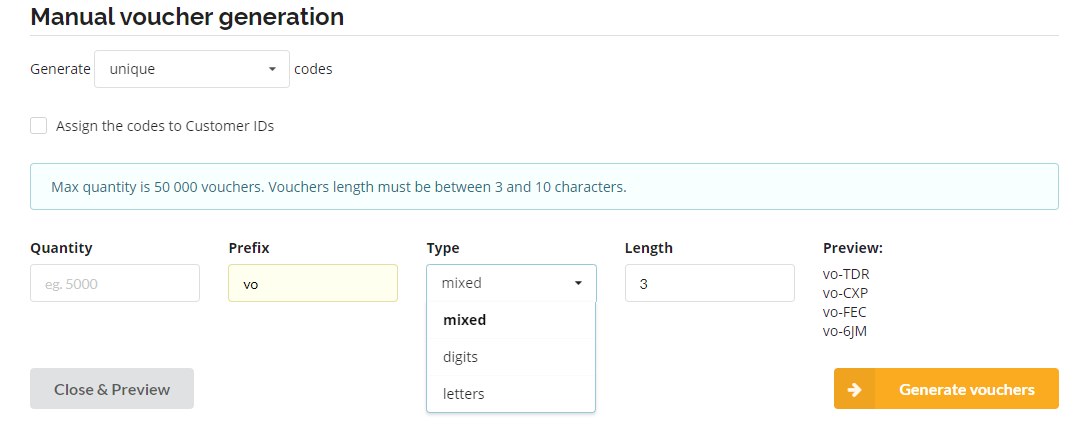
In case of generating Unique Codes, you will need to set the following:
- Quantity: number of unique codes to be generated.
- Prefix: get creative, make your codes start with a word related to your brand or the campaign. eg, Vo, Welcome.
- Type: the type of your code pattern- mixed, only letters or only digits.
- Length of your code.
Triggered automatically option, is chosen to generate the code automatically upon customer's specific action. For example, when you choose Loyalty program from the promotion type
That's it!
Now you can create your first campaign in just Four steps.
Ready for the next step?
Check out How to distribute your coupon codes with Vouchery?
Updated over 6 years ago
